Handling "rough" images
As you may have read, we're putting "rough" images online, before they're perfect, so you can see more of our 50,000-image library. We've developed a system for making quick copies of film images that look okay online. This page explains what we do -- so you'll know what we mean by "rough" and so you can do the same thing with your old film, if you'd like.
This is the last part of the process. You may also want to read about our system for rapidly making digital copies from film.
-
We start with a digital image from the "scanner" (which actually may
be a slide projector and a digital camera -- as we explained
here).
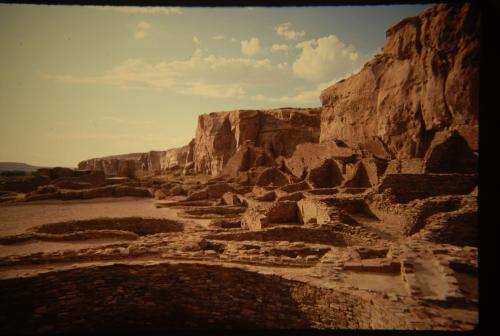
The rough image could have curved edges and bad color.
This one has an overall yellow cast, for instance:
- Open the image in a photo editor. (We generally use GIMP, a very versatile editor that's nearly equivalent to Adobe Photoshop but that's absolutely free. Other photo editors will work fine as long as they let you adjust the level of each primary color in the image -- red, blue, and green.)
- If the image is keystoned (tilted edges) or has barrel or pincushion distortion (where straight lines become curved), you might fix that with the Perspective or Lens-distortion filters. Then, if the image has borders (like the black borders here), crop them off.
- Check the image brightness with the histogram tool and/or the Color Picker. If the darkest parts of the image aren't nearly black, or the brightest parts aren't almost as bright as possible, consider fixing that. (Some images shouldn't have a full brightness range. For instance, images on a foggy day may not have dark blacks.) Or, you may want to wait -- and fix brightness after the next step.
-
If there's a color cast, or the colors just look wrong, try to make
them better.
(You aren't trying to make a perfect image here,
so don't worry too much!)
Your editor's automatic adjustments may do the job, but it may not.
Here's a method that makes serious photographers cringe, but it often
works "well enough."
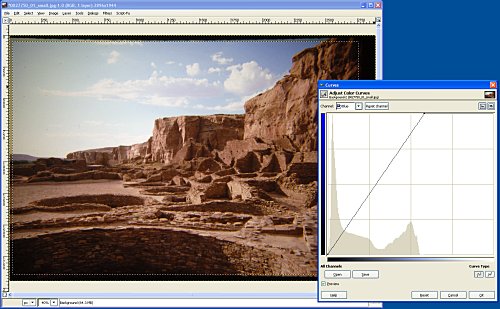
Open the Curves tool -- the one that lets you see and adjust the levels of each color, from darkest to brightest. If the image has a color cast, like our sample image above, you'll usually see that one or more of the primary colors don't fill the graph from darkest to lightest. (For example, the yellow cast is because there are no bright blues -- as you can see in the Blue Curve tool below.) Simply drag the edges of the Curve to the image data, and presto! -- the image often looks much better. (At least, it does for us!)
- Make any other image adjustments and save the image full-size. For instance, there may be big dust spots that you can fix with the Clone or "healing brush" tools -- though remember that, if you want a perfect scan, it may be better to use a real film scanner instead. (The "scans" we make with our quick method can have an amazing amount of detail! Remember, though: saving JPEG images at low quality settings can lose detail. So consider using PNG or high-quality JPEG format.)
- If you'll need smaller versions of the images, you may want to make them later with a bulk-processing tool that can handle many images at once. One might be built into your photo editor, or you can use a high-powered "geek tool" like ImageMagick. (I wrote a three-part introductory articles about ImageMagick for computer professionals: one, two, three. You'll need to sign up for a free Linux Magazine account to read them. By the way, ImageMagick works on Windows and Mac computers too.)
-
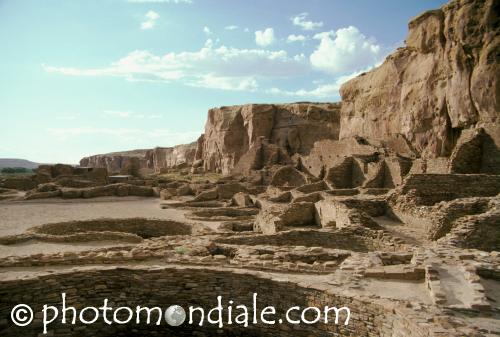
Here's the finished image with a logo pasted on top.
It's still not perfect -- for instance, the sky is still bright --
but it shows what's there:
Once you get good at this, fixing an image can take less than a minute... or, if the original image is good, only 10 or 15 seconds!
By the way, if your photo editor doesn't have keyboard shortcuts (that let you open a menu item with a few keystrokes), or programmable features (so the editor can "learn" to do an operation with a click or two), think about getting a better editor. When you're editing hundreds of images, this can save a lot of time.
If you need to make these rough images from film in a hurry, see our quick-and-dirty method of making rough scans.
Last change (to this page): 23 February 2008